![]()
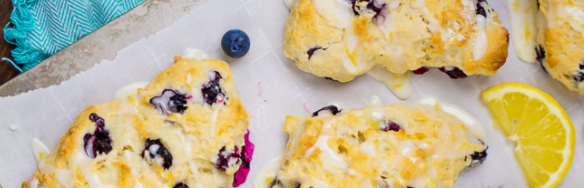
LEMON BLUEBERRY SCONESby Stephanie Leon-Rodriguez (c/o 2022) |
(Scones) You will need:3 cups all-purpose flour 1/3 cup white sugar 1 1/2 teaspoons baking powder 1 1/2 teaspoons baking soda 1/3 teaspoon salt 3/4 cup cold butter 9 tablespoons milk 3 tablespoons lemon juice 2 1/2 teaspoon lemon zest 1 1/2 teaspoon vinegar 1 1/2 cups frozen/fresh blueberries (Glaze) You will need:
2 cups confectioners sugar 1/3 cup butter, melted 2 1/2 tablespoons lemon juice 1/2 teaspoon vanilla extract 2 tablespoons water | Instructions:1. Preheat oven to 350 degrees F 2. Stick your butter for the scones in the freezer 3. Combine all dry ingredients (flour, sugar, baking powder, baking soda, salt) in one bowl and stir until well mixed 4. Cut your butter into the dry ingredients with my fingers until the flour mixture looks flaky and crumbly. 5. Combine your wet ingredients (milk, lemon juice, lemon zest, vinegar) in a separate bowl. Mix well. 6. Pour your wet ingredients into the dry ingredients and mix. NOTE: it may not mix well at first with a whisk. I typically use my hands as I find it mixes better, though it will be a sticky mess. 7. Knead your dough onto a lightly floured, clean surface until your dough is no longer sticky. You may need another person to add more flour to your surface. Slowly knead in your blueberries (be careful not to squish them!). Add more milk by creating a well in the center of your dough if you feel your dough is becoming too dry. 8. Cut your scones into the desired shape (for maximum sconage, I use a pizza cutter and cut small squares). 9. Place your scones onto a greased cookie sheet and bake for approximately 15 minutes (check in at the 10 minute mark), or until your scones are lightly browned. 10. While your scones are baking, create your glaze by adding in all ingredients into one bowl in the order listed. Feel free to add more lemon juice to taste. If you feel the glaze is too thin, slowly add and mix confectioners sugar until it's not too runny. 11. Allow your scones to FULLY cool before glazing. 12. Let your glaze harden and enjoy! |